第一个接口
现在开始写一第一个接口,从最简单的开始:获取一个学生的信息
1. 在entity模块,新建Student类
⑴ 在entity模块,新建包multi.entity
⑵ 在multi.entity包内,新建Student实体类
实体类Student内的成员变量与数据库student表字段一一对应。
输入完成员变量之后,再依次点击 代码 > 生成 > Getter 和 Setter。自动生成所有变量的get方法和set方法

2. 在mapper模块,新建StudentMapper接口
⑴ 在mapper模块,新建包multi.mapper
⑵ 在multi.mapper包内,新建StudentMapper接口
⑶ 给StudentMapper加上@Mapper的注解
⑷ 加一个getById方法,返回类型Student,用于从数据库获取一条学生的信息,并在方法名上用注解@Select写上SQL:
select * from student WHERE id=#{id} and is_deleted = 0
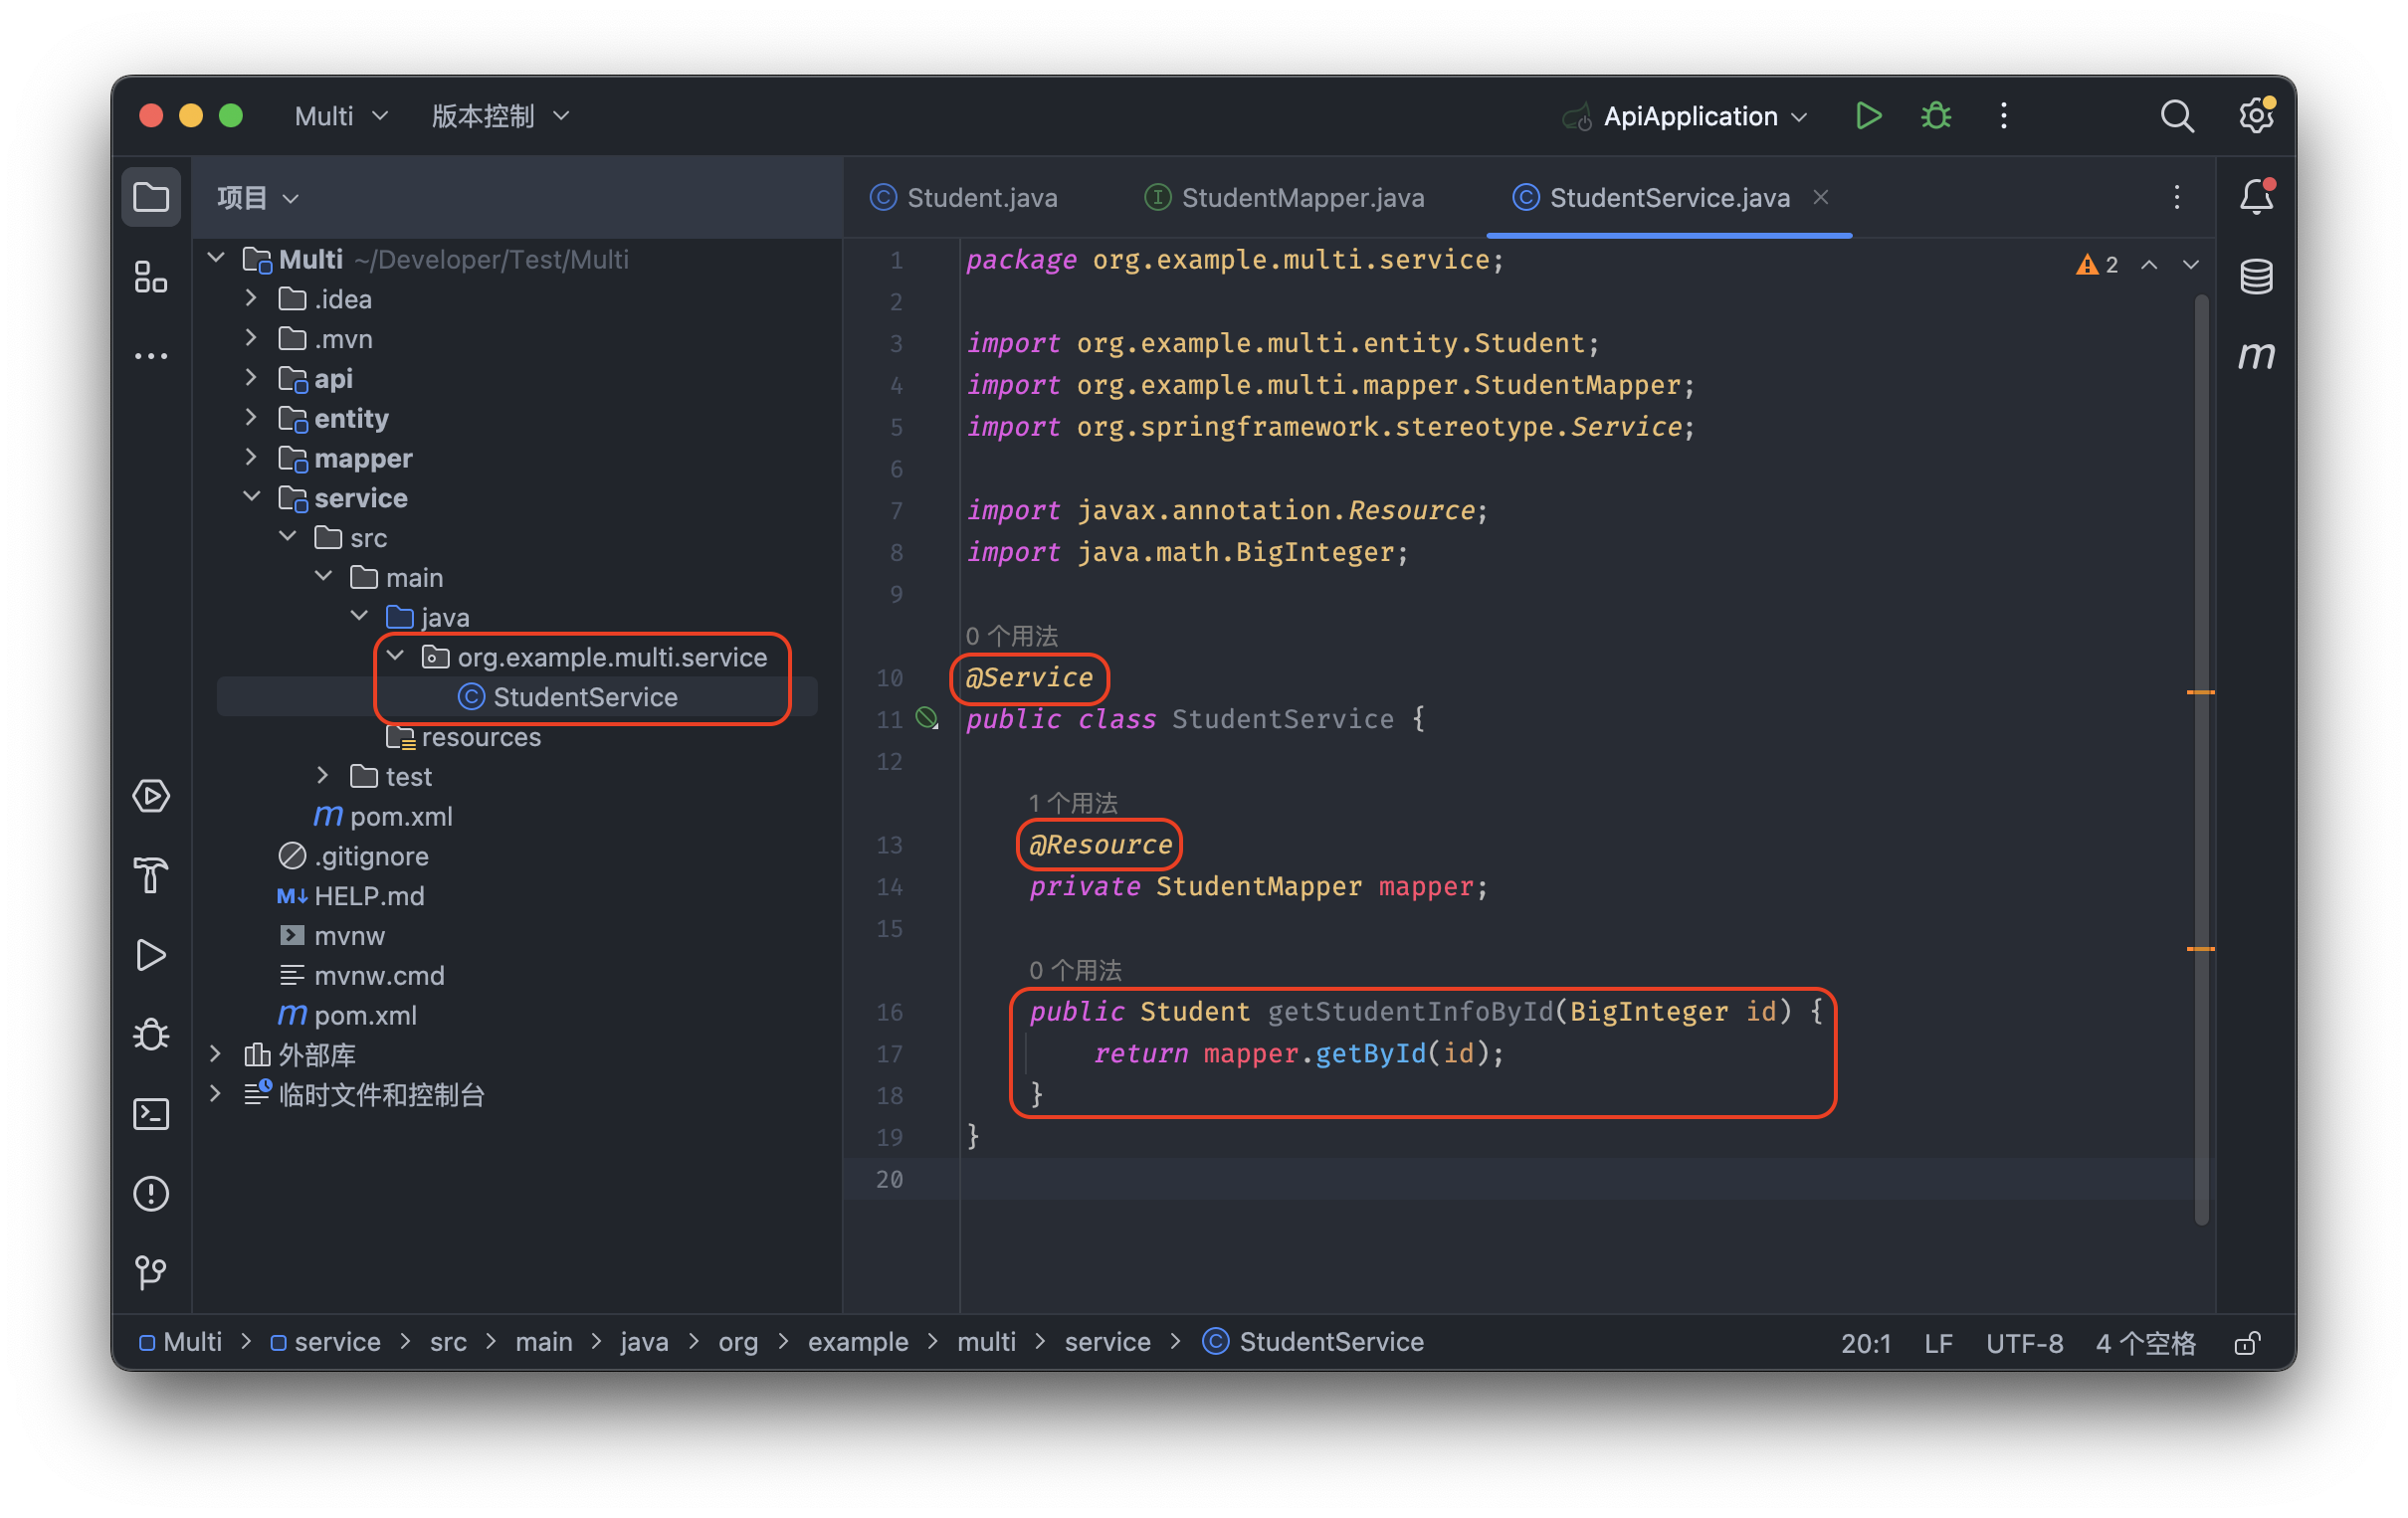
3. 在service模块,新建StudentService类
⑴ 在service模块,新建包multi.service
⑵ 在multi.service包内,新建StudentService类
⑶ 给StudentService加上@Service的注解
⑷ 声明一个成员变量StudentMapper mapper,并给这个变量加上注解@Resource
⑸ 加一个getStudentInfoById方法,返回类型Student。这个方法调用StudentMapper的getById方法获取学生信息
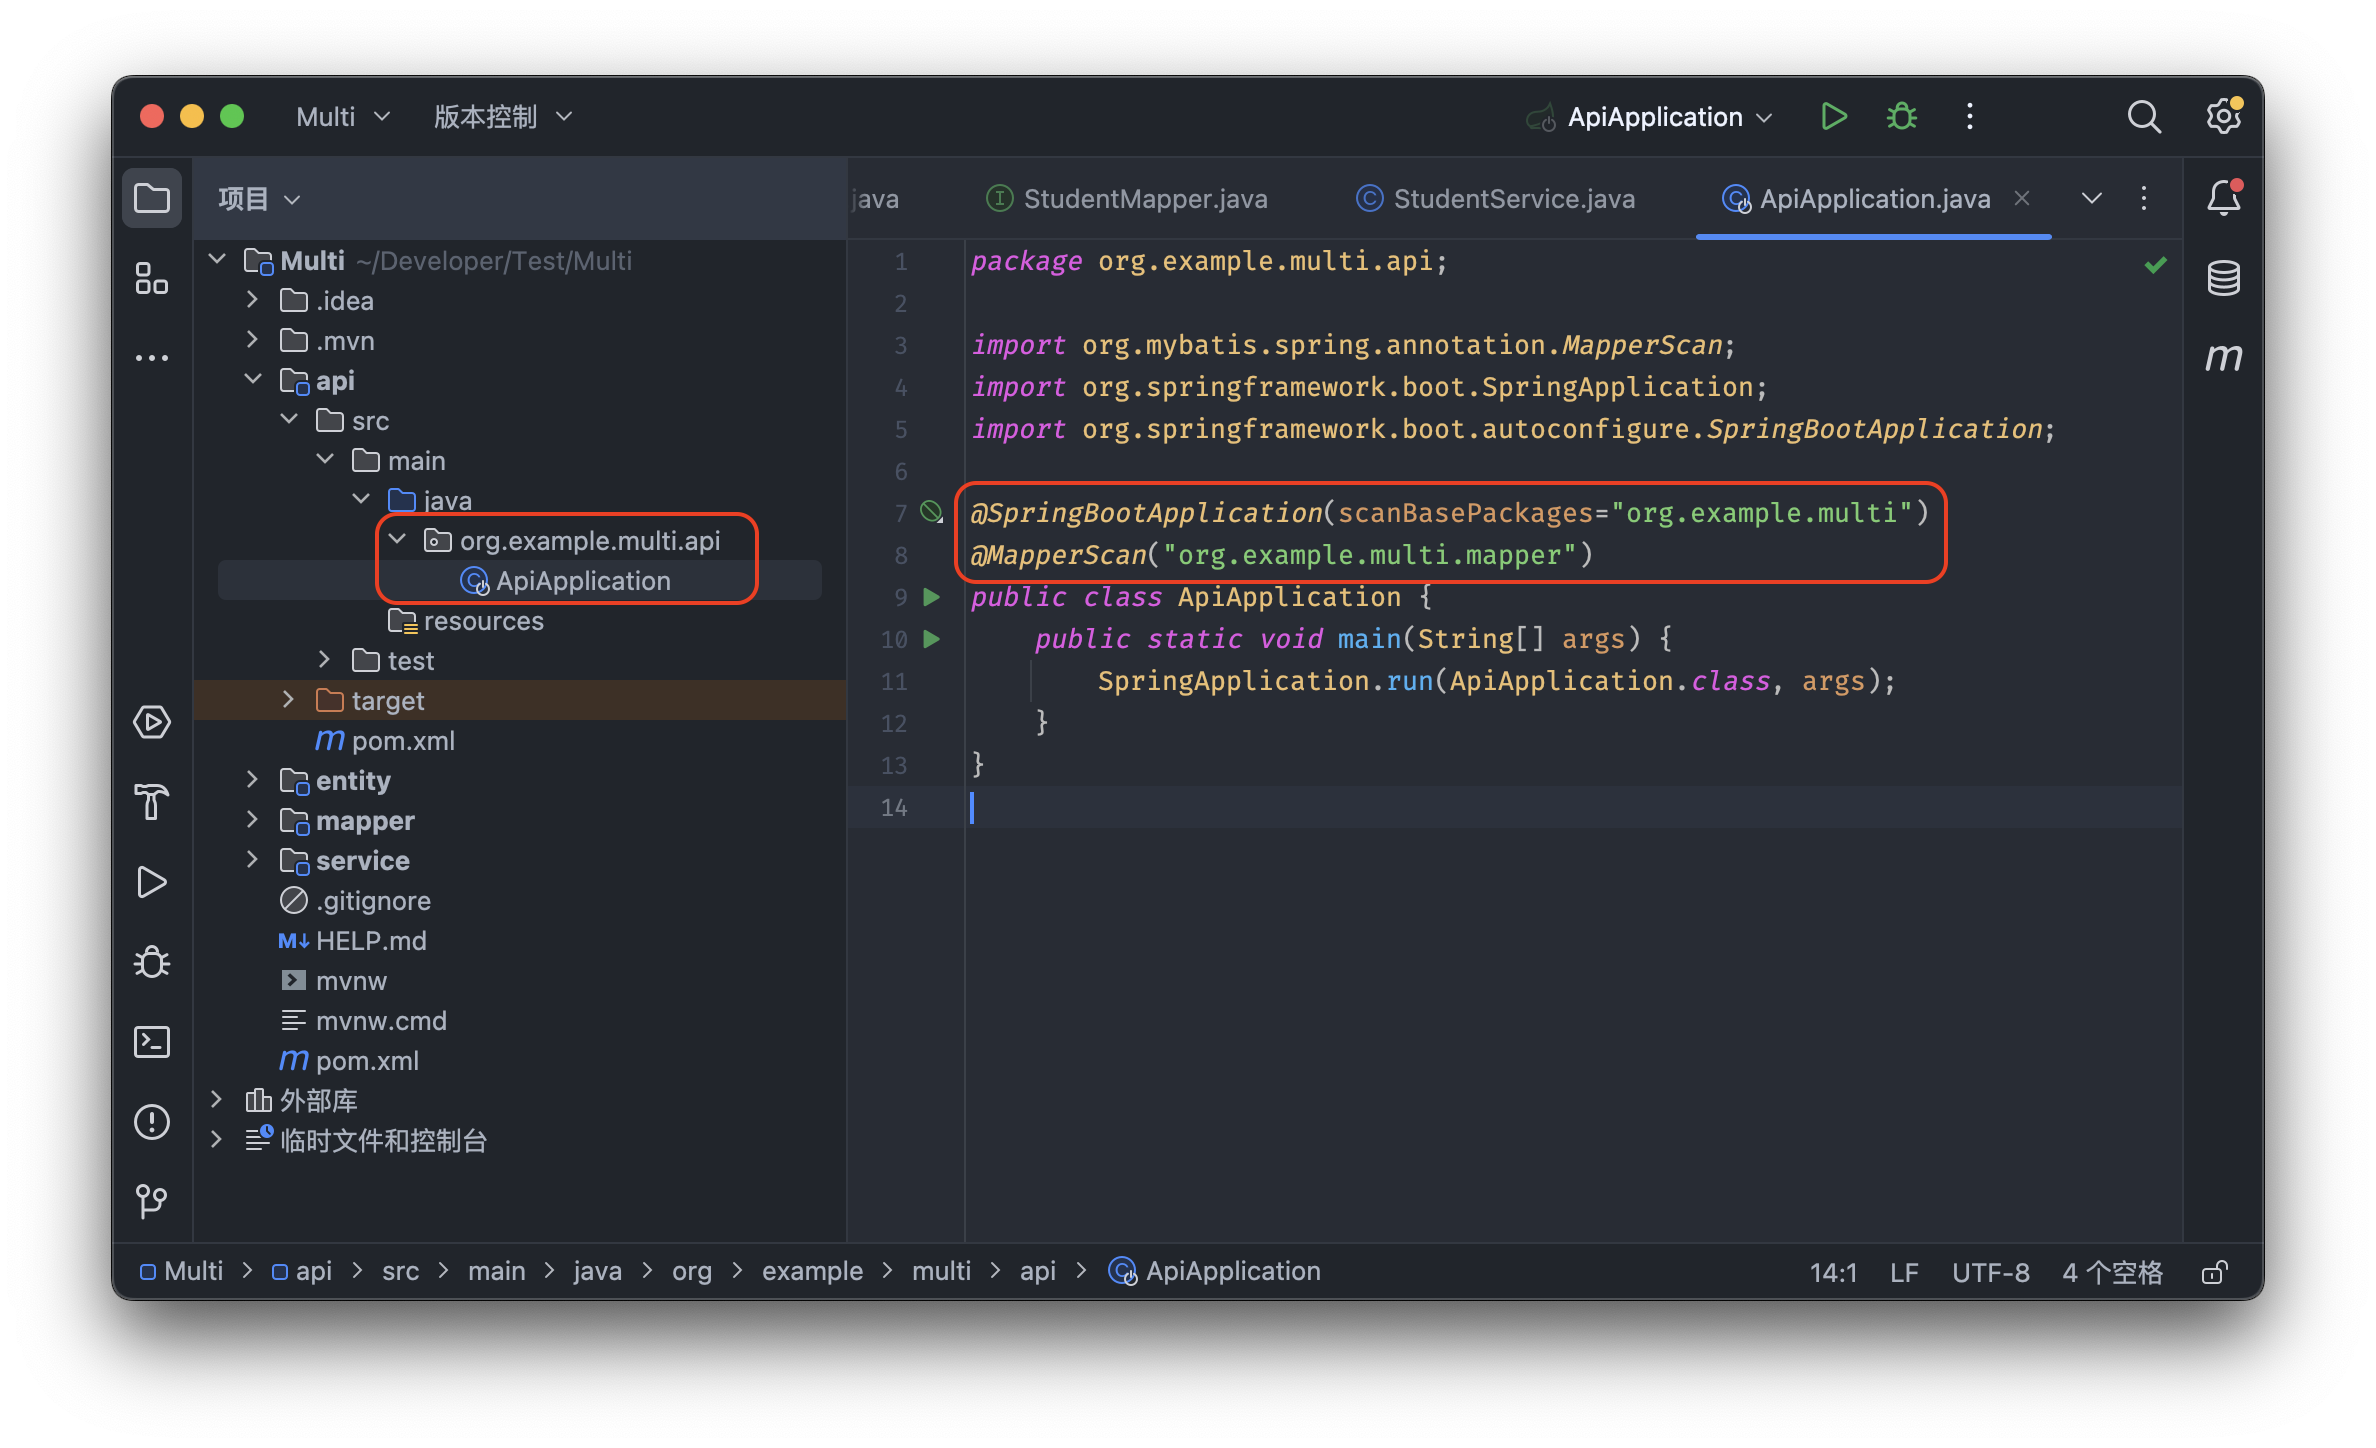
4. 在api模块,新建ApiApplication启动类
⑴ 在api模块,新建包multi.api
⑵ 在multi.api包内,新建ApiApplication启动类
⑶ 给ApiApplication加上注解@SpringBootApplication,并给注解加上参数scanBasePackages="org.example.multi"
⑷ 给ApiApplication加上注解@MapperScan,并给注解加上参数s"org.example.multi.mapper"
5. 在api模块,新建StudentController类
⑴ 在multi.api包内,新建包controller
⑵ 在controller包内,新建StudentController
⑶ 给StudentController加上@RestController的注解
⑷ 声明一个成员变量StudentService service,并给这个变量加上注解@Autowired
⑸ 加一个studentInfo方法,返回类型Student。这个方法调用StudentService的getStudentInfoById方法获取学生信息
⑹ 给studentInfo方法加上注解@RequestMapping,值是/student/info
⑺ 给studentInfo方法的参数加上注解@RequestParam,值是name = "studentId"

6. 在api模块,新建application.properties
在resources目录下,新建application.properties
配置如下:
# 数据库 配置
spring.datasource.driver-class-name=com.mysql.cj.jdbc.Driver
spring.datasource.url=jdbc:mysql://localhost:3306/test?allowPublicKeyRetrieval=true&characterEncoding=utf8&useSSL=false&serverTimezone=UTC&rewriteBatchedStatements=true&useAffectedRows=true
spring.datasource.username=root
spring.datasource.password=111111

# mybatis 配置
mybatis.mapper-locations=classpath:mapper/*.xml
mybatis.configuration.map-underscore-to-camel-case=true
7. 启动应用,测试接口是否成功返回数据
⑴ 点击“M”图标,打开Maven工具窗口。然后依次执行父模块的clean和install

⑵ 点击“调试”图标,以调试模式启动应用

⑶ 查看控制台是否有错误。如果没有错误,并且显示Started SingleApplication,说明应用已经成功启动。

⑷ 打开浏览器,在地址栏输入:http://localhost:8080/student/info?studentId=1
如果显示如下图,返回了学生信息,表示成功完成了第一个接口

